
Passive Range of Motion Testing and
Post-isometric Relaxation of the ShoulderThis section is compiled by Frank M. Painter, D.C.
Send all comments or additions to: Frankp@chiro.org


By Frank M. Painter, D.C.
Passive range of motion (ROM) testing of the shoulder is accomplished with the patient supine, and the shoulder joint slightly off the table. The humerus should be abducted to 90° away from the body, so that full internal and external rotation of the humerus can be explored. From the neutral position (with the forearm pointing at the ceiling) normal ROM findings would involve a full 90° of external and internal rotation.
Passive Range of Motion Testing
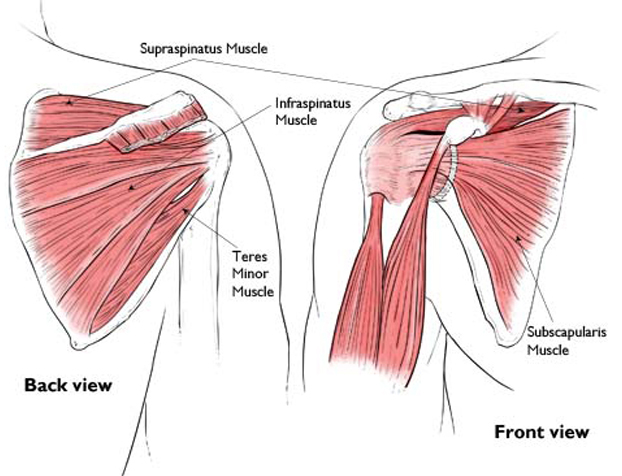
Internal Rotation. Internal rotation of the shoulder is controlled by four muscles: the subscapularis (C5-C6), pectoralis major (C5–T1), latissimus dorsi (C6–C8), and teres major (C5-C6). The anterior deltoid assists.
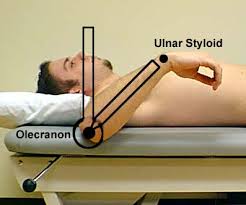
The starting position would be with the patient's forearm pointing straight up at the ceiling. From this position the arm can and should be able to rotate a full 90° in either direction.
The individual on the right has lost almost half of his ability to internally rotate at the humerus, due to shortening of the external rotators.
The common link between all these muscles is the C5 segment.
Subluxation of C5 is common in those who present with shoulder complaints.
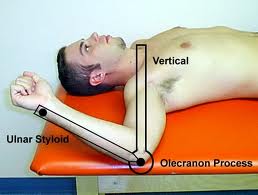
External Rotation. External rotation of the shoulder is conducted by the infraspinatus (C5-C6) and teres minor (C5), with assistance by the posterior part of the deltoid.
The individual on the right has lost about one-third of his ability to externally rotate at the humerus, due to shortening of the internal rotators.
Mild over pressure on the forearm during this test will usually elicit pain and withdrawal sign by the patient.
and the tendons that form the rotator cuff and stabilize the shoulder joint.
(c) American Academy of Orthopaedic Surgeons, 2003.
PIR of the Rotators
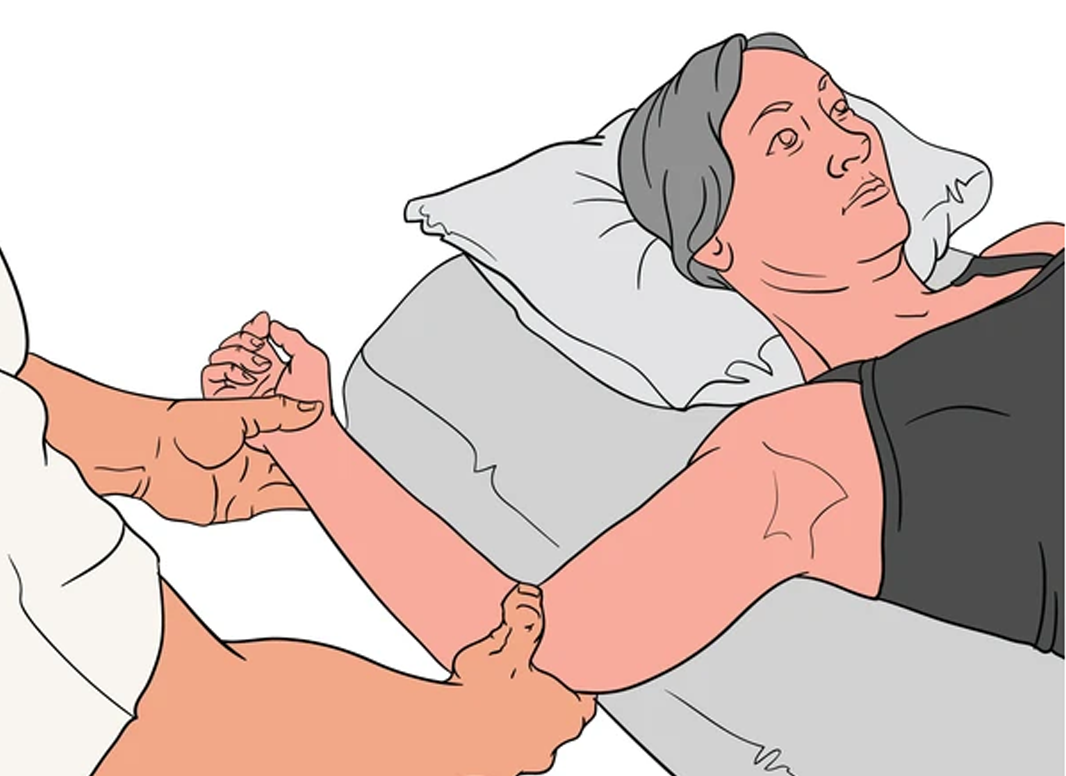
Post-isometric Relaxation (PIR) of the shoulder (rotator cuff) is straightforward. I do it sitting on my roll-away chair, at their side, facing the patient, because this puts us both at the same level. The picture on the left demonstrates poor positioning for the doctor (standing). When you are sitting at their side, with their humerus perpendicular to your chest, you have the maximum mechanical advantage, and you have to exert the least amount of effort resisting them during the contraction phase.
The starting position is that their humerus is abducted to 90°, and their forearm is pointing up at the ceiling. From this point, it is easy to observe passive excursion of the humerus, as it rotates in either direction (into EX or IN rotation).
When working on the patient's right shoulder, if I was checking their internal rotation, I would first grip their elbow with my left hand and apply mild traction (to loose pack the shoulder joint) and then I would passively lower their forearm (palm down).
If there is a restriction, I would place my right hand on top of their forearm close to the wrist and gently push down, until you reach the “barrier” (passive end-range). Once at this starting position, I would ask the patient to raise their forearm (to externally rotate the humerus) at about 50% of their ability.
Overall, they will contract for 30 seconds. Half way through their contraction, I will ask them to take a deep breath and hold it, while still maintaining their contraction. When they release their breath, ask them to relax the arm, and then “follow” the forearm down with a gentle over-pressure. Hold this gentle stretch for 30 seconds. Quite often you will feel a release, followed by the gradual lowering of the forearm.
For testing the right shoulder for external rotation the starting position is the same, with the doctor supporting the upper arm parallel to the floor. If there is a restriction and loss of full range of motion in ER, I would use my right hand to traction the shoulder joint, while placing my left hand on their forearm to bring it to the end-point. Then I would ask them to try to internally rotate the humerus at 50% power for 30 seconds, and to take a deep breath after the first 15 seconds. After 30 seconds instruct them to blow out the breath and let the arm relax, while I follow them further into external rotation with a mild over-pressure. It's common to feel one or more releases, as the arm slowly ratchets further into extension.
Some therapists maintain that eye movement facilitates this procedure: rotating the eyes upwards (towards their forehead) facilitates contraction. When they release their breath, instruct them to look down (towards their feet) to facilitate relaxation. I do not routinely do this, but thought I would include this information for completeness sake.
Thank to Dr. RC Schafer, Dr. Leonard Faye, Dr. Craig Liebenson and all the instructors of the Rehabilitation Diplomate Program, developed by Craig and LACC (now SCUHS), for their combined wisdom!
You may also enjoy R.C. Schafer's monograph on
Shoulder Girdle Trauma from our
Shoulder Page

Return to the SHOULDER Page
Since 2-14-2012


| Home Page | Visit Our Sponsors | Become a Sponsor |
Please read our DISCLAIMER |


